Eyeliners have come to stay. Almost no makeup look is complete without the defining look of eyeliner. Eyeliners give your eyes that va-va-voom effect. Most times i go about with a nude face, but with my eyeliner on for that defining face look.
Eyeliners have come in different forms and styles to leave you dazzled. I mean, we can’t seem to have enough. One such eyeliner style is the winged liner. Yes, winged eyeliners have kept us on the hook for so long, and it’s not letting us go anytime soon.
How to do a Winged Eyeliner in 10 Ways Plus
Let’s go on a winged adventure as we explore 10 Winged Eyeliners to rock. I will be showing you a step-by-step guide to creating these winged looks.
Ready, Set…Let’s Wing It!
1. Simple Winged Eyeliner Look
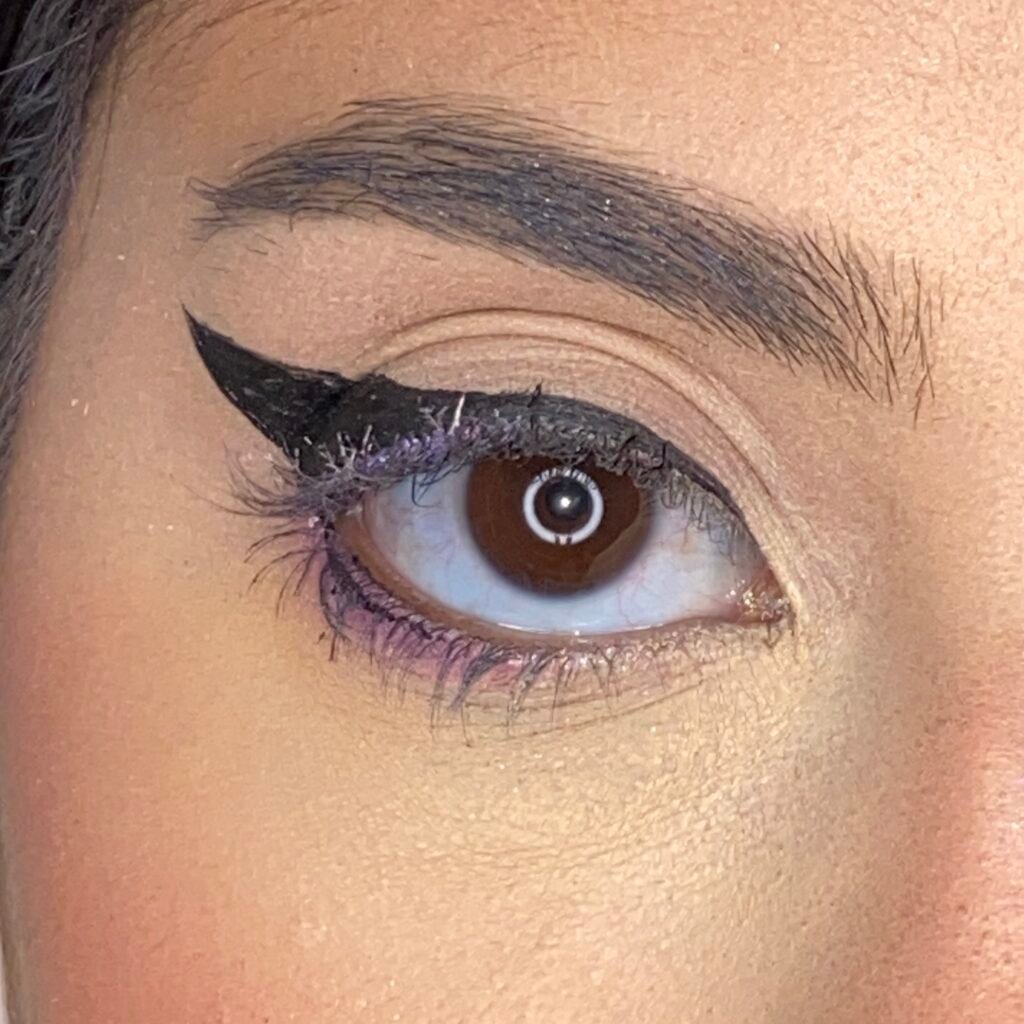
This winged look is only slightly different from the traditional winged look. The traditional winged look has a slimmer winged tail. You can make yours as thin or as thick as you’d love.
Steps to creating this look:
Make sure your brows are properly groomed and in place. Carrying bushy brows doesn’t give a glamorous finish to your look.
Get a liquid eyeliner. I must add here that liquid eyeliners are perfect for drawing precise cat-eye wings.
Use the tip applicator to create a wing at the corner of your eyes with your black liquid eyeliner.
Extend this wing towards the end-tip of your brows.
Use your other finger to get a precise wing by gently pulling your skin to make it taut; this helps avoid wavy lines.
Pull lightly at the corner of your eyes and draw the liquid liner back into your upper lid.
Keep your eyes in an open state,
Take the liquid eyeliner applicator and use the tip to line your eyes till you connect the line to the wing.
Fill in the lines where necessary, and there you have your wing.
But hey! Our look isn’t complete yet.
Using a waterproof pencil to line the waterline to avoid irritations and allergies is in your best interest. If you are a pro and your eyes are not sensitive, you can use your liquid liner tip with very little product on it and line your lower lid.
Line it before the middle of your eyes.
Use a small makeup brush with your favorite eyeshadow color and line below the dark line on your waterline.
It’s that simple!
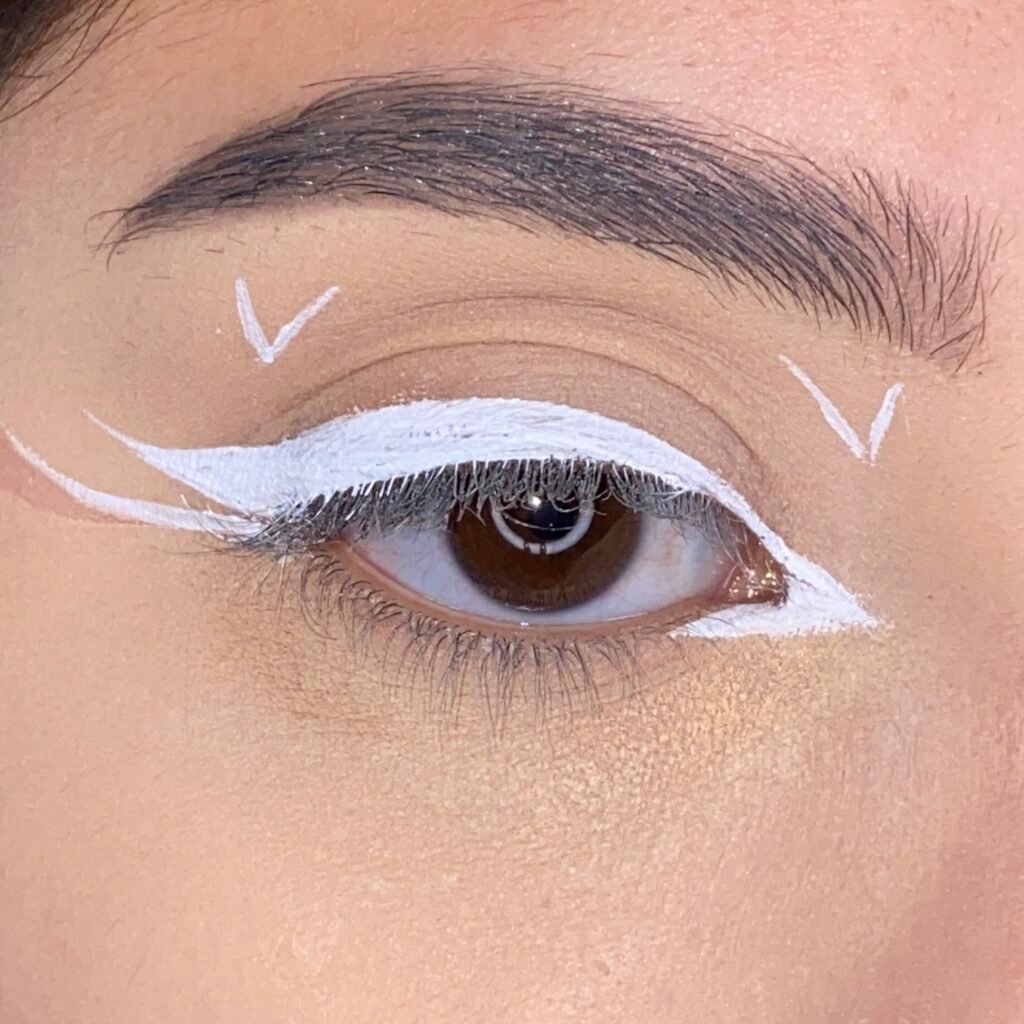
2. Here to Heart White Winged Eyeliner Look

So white liners are in vogue, and you want to try this look? You should! And here is how:
Steps!
Get your brows groomed as usual.
Get a white liquid eyeliner.
With your other free hand, gently pull your eye skin upwards close to the temple. Doing this makes your skin taut and gives you a more straight line.
Use your liquid white eyeliner and draw out a wing, stretching almost outside the up of your brows.
Take the line back inwards back to the middle of the upper lid.
Start close to the inner corners of the eyes with the eyeliner and connect your lids to the wing.
Line and fill any missing spaces to get your perfect wing!
Using your applicator, draw a line from your outer crease and connect it to the wing.
To nail this look completely, use your white eyeliner tip and creatively draw a love or heart sign.
Draw a heart sign on the brow bone. Draw a heart underneath the wing. And the last one underneath your brows, above the inner corner of your eyes.
You are sure to capture hearts with this white winged look!
3. Purple Crease Winged Eyeliner Look
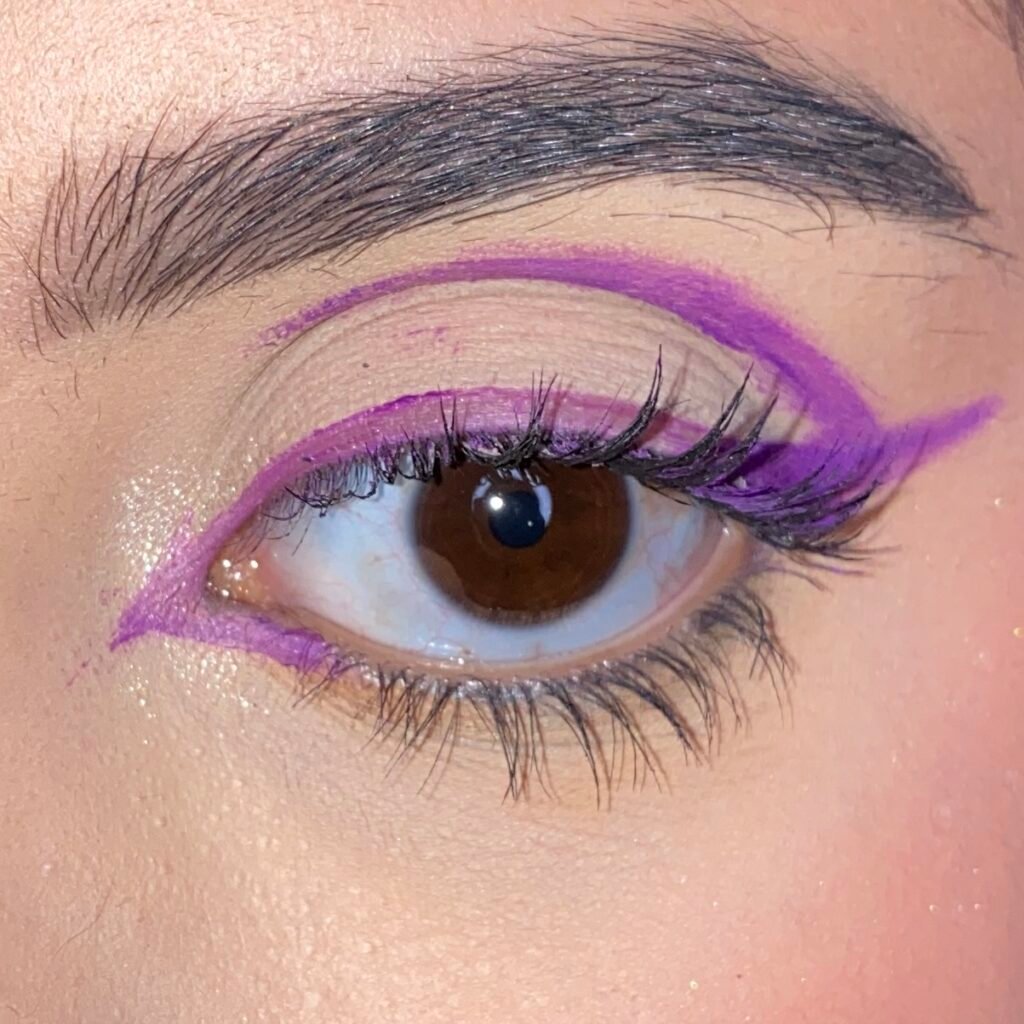
If you’re looking for a winged eyeliner looks perfect for round eyes, you can’t go wrong with this one! This winged look requires using colored eyeliner. You can use any color of your choice.
Steps
Draw out a wing at the outer corner of your eyes.
Draw this wing back into the middle of your upper lid.
Use the tip applicator, start to line your eyes from the inner corners, and line back to the wing.
Use the tip again, gently pull the inner corner of your eyes towards your nose, extend out the inner corner and line into the lower lid, and stop there.
Use the tip applicator, and line your upper crease halfway into the wing. The connection shouldn’t meet at the end of the wing.
Dazzle your eyes by dabbing some shimmering eyeshadow to the inner corner of your eyes.
4. Unique Winged Eyeliner Look
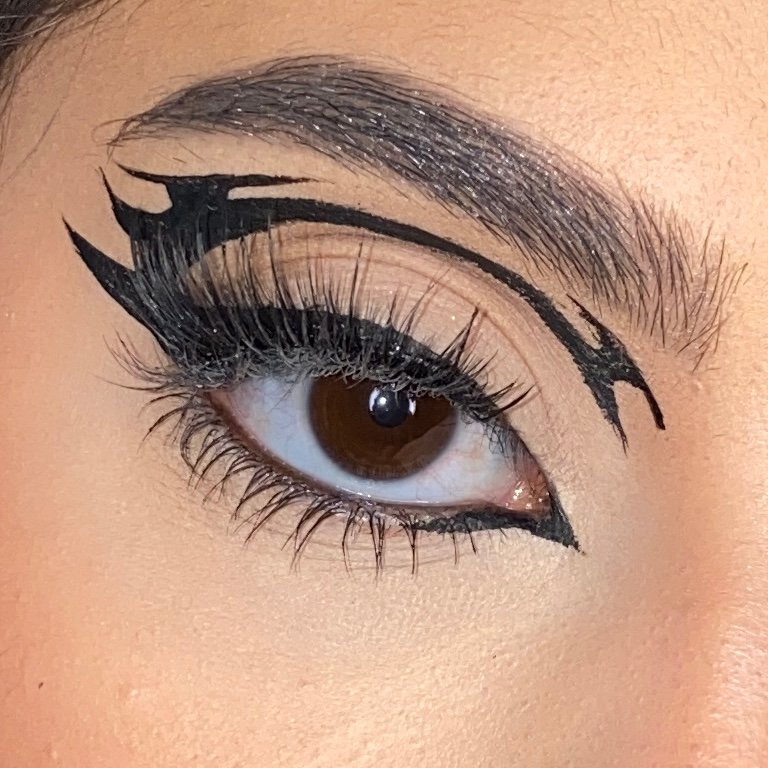
This winged look requires using a black liquid eyeliner. This winged look is definitely for the bold and daring who don;t mind dragging all the attention.
Steps
Prepare your eyelids by prepping them with some eyeshadow primer first.
Next is to dab on some neutral skin toned eyeshadow to your eyelid.
Draw out a wing at the outer corner of your eyes.
Draw this wing back into the middle of your upper lid.
Use the tip applicator, start to line your eyes from the inner corners, and line back to the wing.
Use the tip again, gently pull the inner corner of your eyes towards your nose, extend out the inner corner and line into the lower lid, and stop there.
Use the tip applicator, and cut a crease from the wing to your inner corners.
Your hands should get creative as you you draw another crease having ragged tips.
For a well defined almond cat-eye look, line your waterline with a black pencil.
5. Mild Smokey Winged Eyeliner
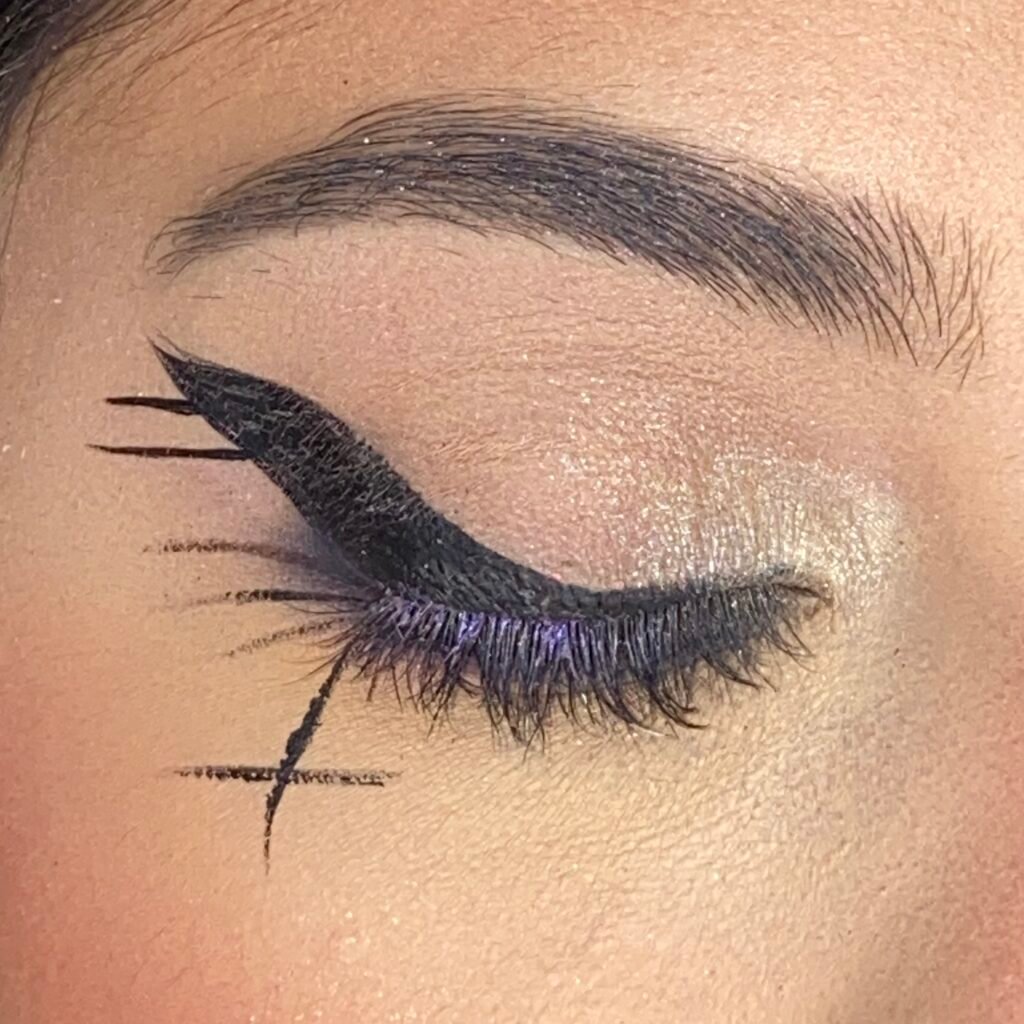
Try this nonconventional smokey look to break out of the norm!
To create this look, follow these simple steps:
Draw the wing at the corner of the eyes.
Line your lids while connecting to the wing
Use a dark eyeshadow underneath the wing and a little line under your eyes.
With the liner, the applicator draws two strokes out on the wing.
Pull the outer corner of your lower lid and draw three strokes out.
The last stroke looks like a cross.
Pull down your lower lid, drown a stroke downwards, and cross it with another stroke.
To complete this look use a small brush with golden eyeshadow and dab it into the lower and upper inner corners of your eyes.
6. Double Winged White Eyeliner
Create this White Winged Eyeliner with the following Steps
Make sure your brows are well groomed and in place.
Get your white eyeliner and draw the regular wing and line your eyelid.
Ensure the wing widens from the midsection to the outer corner of the eyes.
Extend the eyeliner effect to the inner corners of the eyes and draw into the lover’s lid.
With the eyeliner, draw out a longer winged stroke underneath the other wing.
Lastly, draw a V stroke on the brow bone and the space between your brows and the inner corner of your eyes.
Your white eyeliner look here is complete.
7. Pencil Eyeliner Look
This look is easy to create, and you can do so with a liquid liner or a pencil. And here is how to go about it:
Steps
If you are using a pencil, make sure your pencil tip is very sharp; else, you will end up with blurry lines.
Start with extending a wing out from the eyes.
Draw the end of the wing back to the eyelid.
From the end of this first wing, use your liquid eyeliner or pencil tip to cut a crease line on your upper lid.
Cut the crease upward towards the brows but not touch it yet.
From where the last wing touched the eyelid, draw out another similar to the first one.
Draw the wing back to the inner corner of the eyes.
Extend this further from the inner corners of the eyes and line it back into the lower eyelid
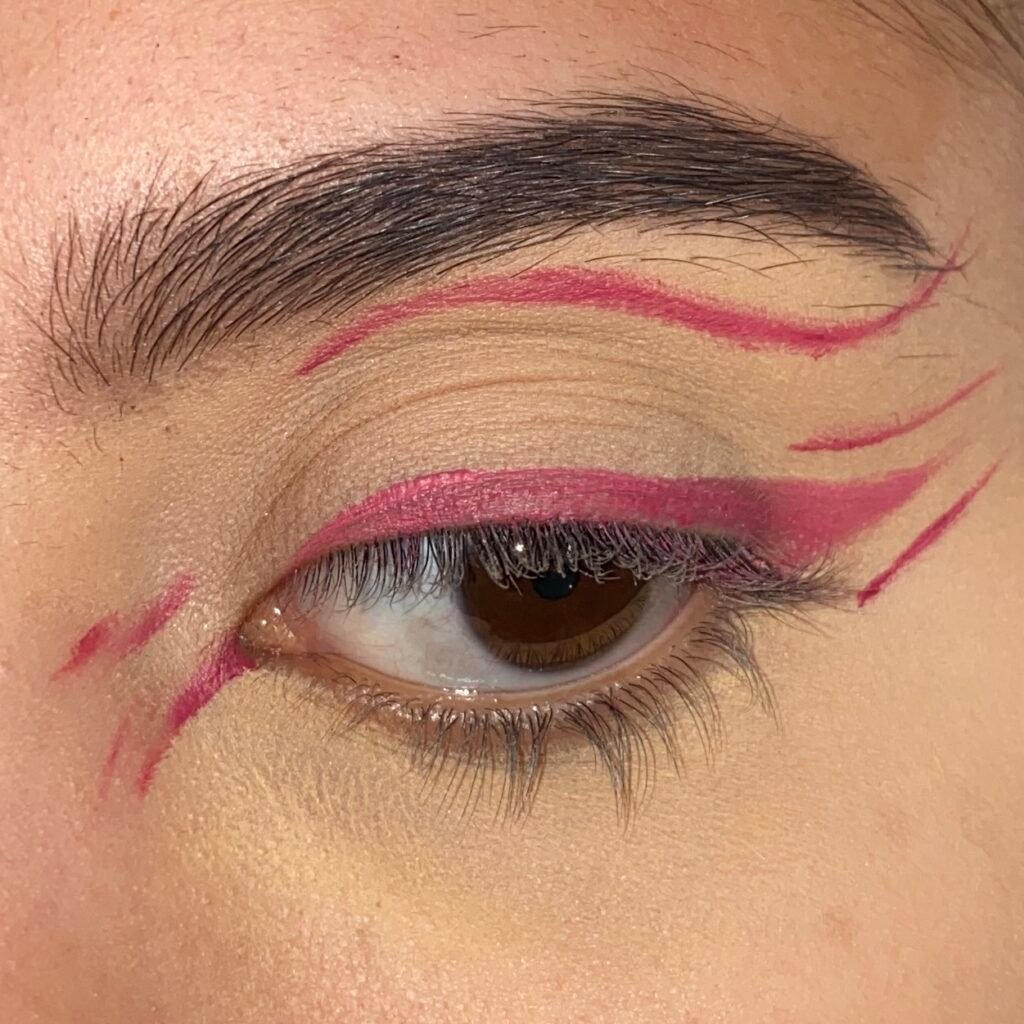
8. Unique Pencil Eyeliner Look
Steps
This look was created using colored pencil eyeliner. Sharpen your pencil well to give you a sharp pointed tip.
Pulling your lid outwards, draw out your wing. When using pencils, make sure you don’t slant the pencil, but instead, hold it straight.
Lightly line the inner corners of the eyes.
Draw a crease cut that is slightly above the crease towards the brows.
Avoid getting too close to your brows.
Extend the tail of the crease to wing out at the edge towards the tip of your brows.
Draw a stroke above and below the wing with your pencil and liner.
Draw out a stroke from the inner corner of the eyes and another stroke or two above that one.
9. Winged Eyeliner for Round Eyes
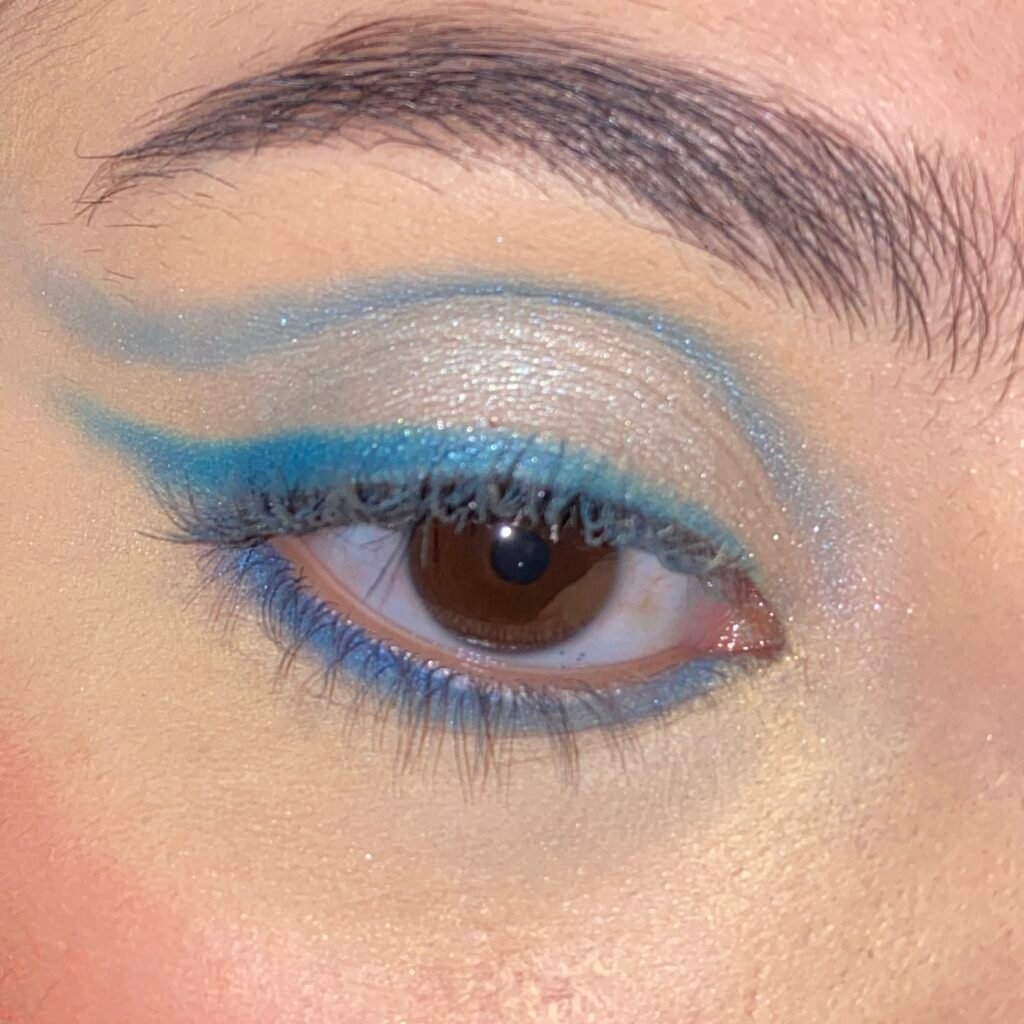
This look is slightly different from the previous, because it uses an eyeshadow at the base.
Prep your eyelids for this application by applying an eyeshadow primer on your upper lids. This is to help your eyeshadow makeup stay on for longer.
Once it has been well blended into the skin, apply silver or pale blue shadow to your lid with an eyeshadow brush.
Apply this eyeshadow to completely cover your lid, avoiding it going beyond your crease.
Using darker eyeliner, draw out your regular wing and a line underneath your lower lids.
Eyeline your eyes completely from the outer to the inner corners.
Use the pencil to cut a crease on your eyelid.
Extend the crease to wind out at the edge, just above the first wing
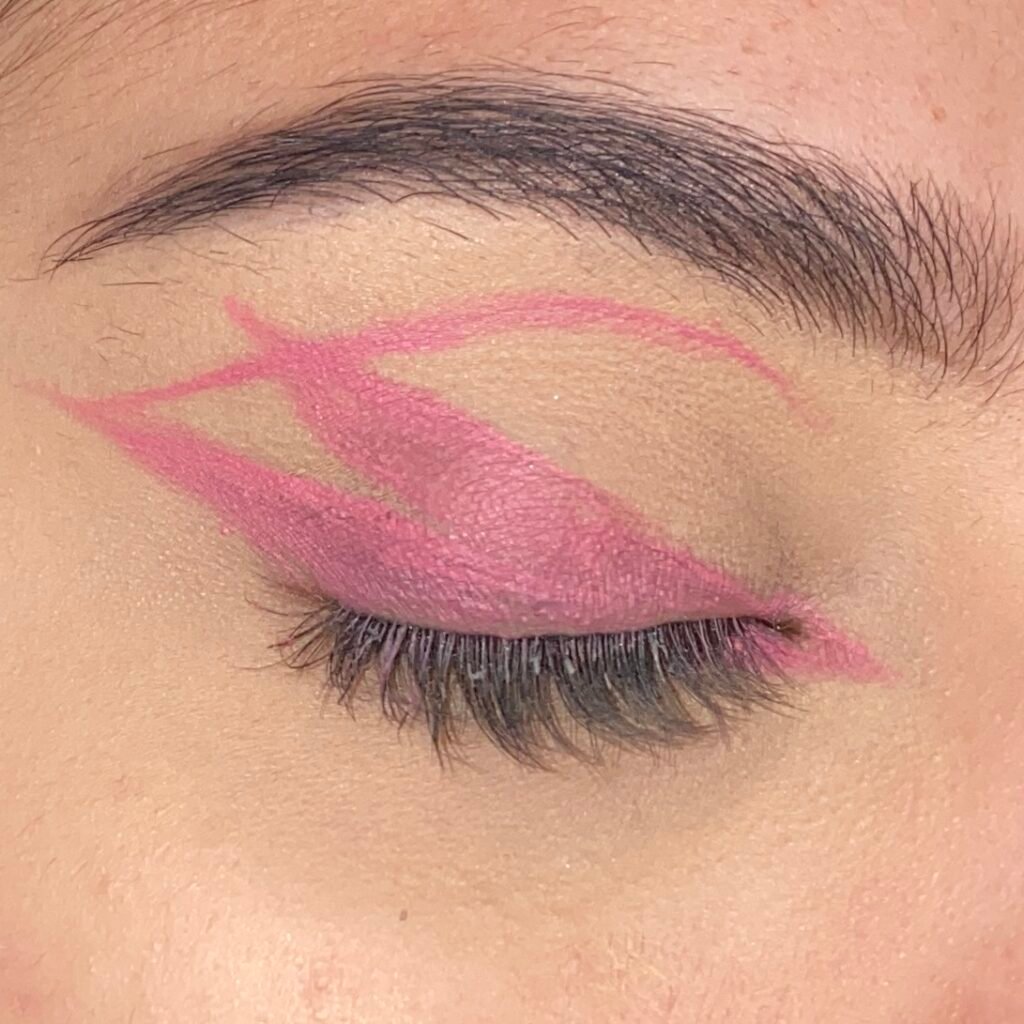
10. Dramatic Winged Eyeliner Look
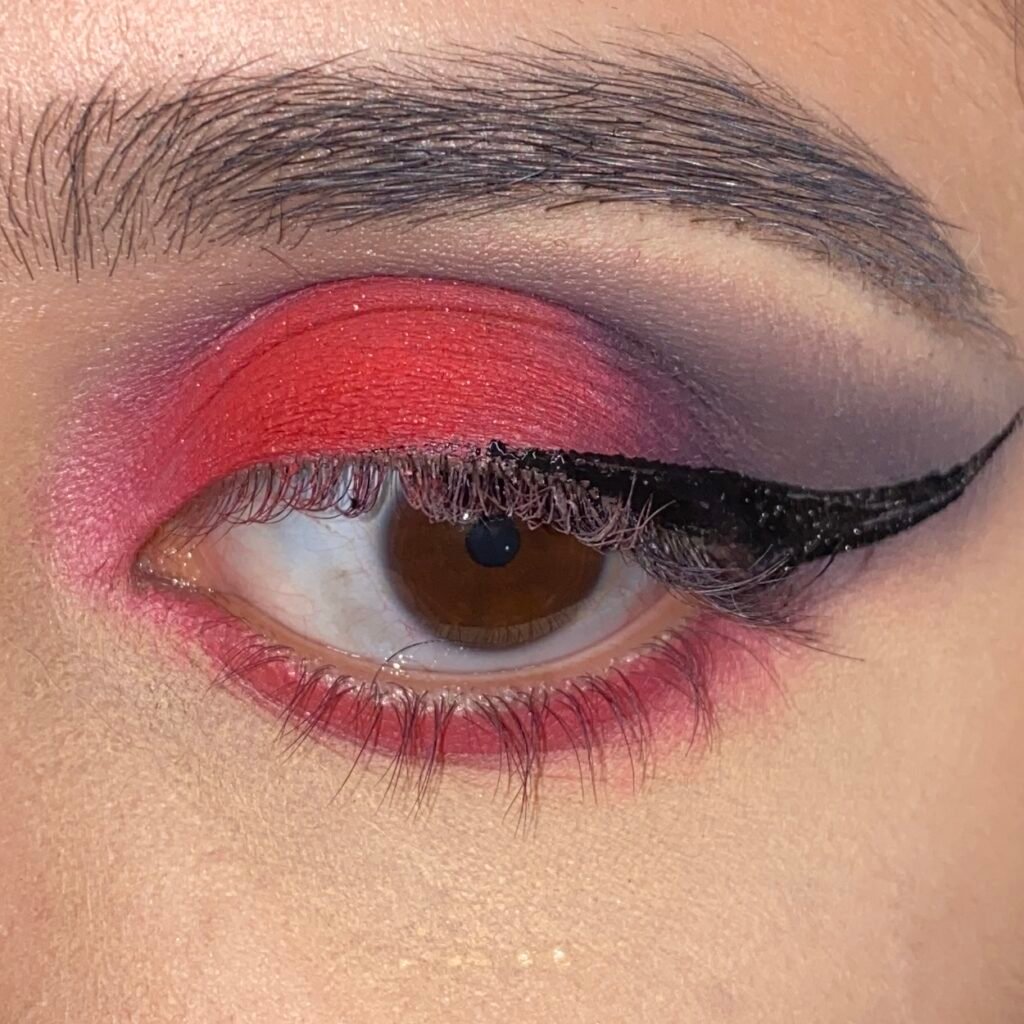
To create this look, you must adequately prime your eyes with an eyeshadow primer.
Make sure your lashes are well carved and in place.
Begin this look by applying a base eyeshadow
Preferably use a dark-colored eyeshadow in black or coal.
Apply this eyeshadow as the base eyeshadow from the outer eyes in a crease pattern towards the inner corners of the eyes.
Get lighter in your application when approaching the inner corners of your eyes.
With an eyeshadow brush, apply a pink-colored eyeshadow to cover the eyelid from the inner corner of your eyes to the outer corner. Don’t apply this color over the base eyeshadow.
Use the same brush and brush on your lower lid from the inner to the outer corner of your eyes.
After applying the eyeshadows, use your black liquid eyeliner to draw a wing.
Draw the wing out towards the tail of the brow
Draw the wing back to the middle part of the upper lid.
Use a lighter color or bronzer to highlight the brow bone and add a pop to your look.
Bonus Look: Bold, Colorful Winged Eyeliner

Looking to make a statement with your eyes? This look is just perfect for that. To achieve this look, start by prepping your eyes by applying eyeshadow primer first.
Reach out for your eyeshadow palette, reach out for yellow color, and apply it to the first part of your lid.
Reach for a pink color next and apply next to the yellow color.
Lastly, apply a purple color in a winged out pattern.
To complete this look, use a liquid white eyeliner to create a wing that cuts a crease over the eyeshadow halfway.
Pro Tips and Hacks for Winged Eyeliner Looks
To avoid the looks of white liner stains on your lashes or colored eyeshadow that isn’t pretty, use your regular mascara to darken your lashes, but do this carefully. Gently use a business card on your lid to avoid mascara smudging on your eye makeup and ruining your hard work.
Please leave the card a while longer till the mascara dries and you are sure it won’t smudge.