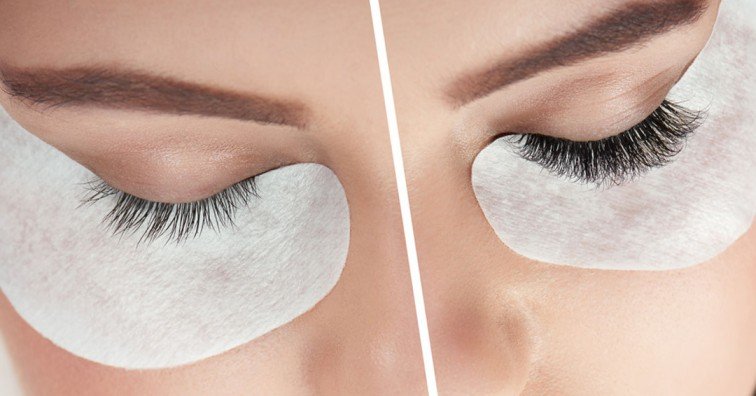
Eyelash extensions can give you that glamorous look and boost your confidence; they might be just what you need in your style revamp. You can customize your look by choosing a style that best accentuates your features and makes your eyes pop.
Lash extensions have become something almost every girl wants to try out at one point in their life. The thought of just waking up to beautiful lashes every morning without applying makeup is exceptionally provocative and might be your push to knowing how to apply eyelash extensions.
If you are looking at applying lash extensions yourself or someone else, you will find this article very helpful.
Before starting eyelash applications, you should put certain things into consideration.
What You Must Know Before Applying Lash Extensions
Eyelash extensions are to be applied with great caution and skill, and that’s why this article shows you what you must pay attention to before starting. It’s easy to rush into eyelash application and come out with little or no results, but success is guaranteed with the correct information.
- The Safety of The Eyes
Lash Extensions are applied on one of the most sensitive organs of the human body, and hence fixing it must be done with caution, avoiding any direct contact with the eyes.
The lash extension is fixed along the lash line and with the eyes safely closed, or eyelid safely lowered in cases of extension strips or falsies. Sharp objects are to be far from the eyes, and you should handle tweezers well.
- The Strength Of Natural Lash
Before starting, you must take into cognizance the ability of the natural lash to hold up an extension. Extensions come in different sizes and materials, affecting how thin or thick the extension can be.
People with thinner-looking lashes should avoid very heavy and voluminous lashes as this could weigh heavily on their natural lashes and cause them to break easily. So consider the strength of your natural lash and select a style well suited
- Create An Hygiene Environment
Fix lash extensions in a hygienic environment. Make use of gloves, and you can have your tools sanitized by spraying isopropyl alcohol on your tweezers and lash brush to prevent germs that would cause irritations and even possible eye problems.
- Choose Your Lash Material
Lash extensions come in different materials, and you can choose based on your budget and preference. The materials used range from mink, silk, and synthetic fibers. It is always an advantage to verify your extension material to avoid possible allergies. Extension safe from mink could cause possible allergies for some people. Be sure to be safe.
- Rightly Source Your Application Materials
Fixing a lash extension will require essential tools like tweezers, semi-permanent glue, and an eye pad. Get sufficient details about your supplies, and do not cut corners.
Purchasing the right tools is essential to achieving a great look and having a stress-free application process. The wrong choice of lash glue can cause eye irritations and a burning sensation. Check product reviews to ensure you are right on track.
Step By Step Application Method
This article will show you the easy steps to make your lash extension applications look like a walk in the park. Note that eyelash extensions come in individual lashes or strips. We will give you a Step by Step guide to fixing both!
Fixing Individual Lashes and Lash Fans have the same procedure. Lash fans can easily be created by gluing two or more strands together, or you can purchase already made lash fans.
Step By Step Application For Lash Extensions
So, let’s get right into the juicy part by showing you how to fix beautiful-looking extensions.
Step One
Get settled and comfortable in a diagonal or tilted position to allow the lash stylist full access to your face.
Step Two
Get out all your cleaned application tools and set them close by and ready. Hygiene is paramount, and you must wear your hand gloves for proper hygiene.
Step Three
Keep the eye area clean and free from dirt or makeup by using a face cleanser or makeup remover to wipe the eye area.
Step Four
Fix a hydrogel eye pad on the lower lid to the under-eye circle. These eye pads usually come in white under-eye strips that give a contrasting background for easy application.
Step Five
Safely secure the eye pad with medically safe strips to prevent shifts. Place strips on the closed eyelid to reduce the tightening or twitching of the eyelid, disrupting the application process.
Step Six
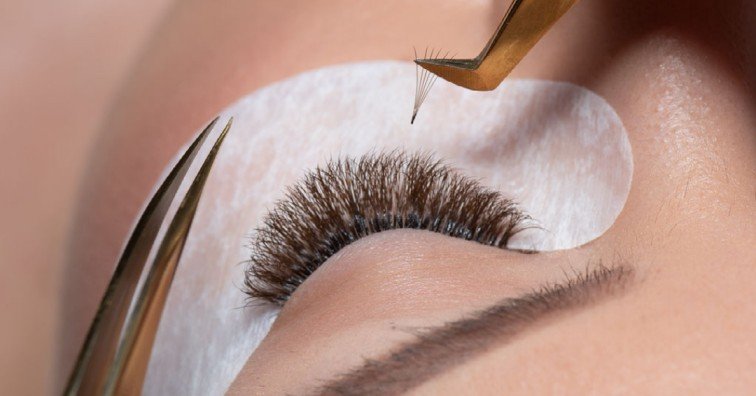
Use your tweezers to pick one lash extension or lash fan, dip the head into the glue, and attach it to an already isolated natural lash. Remember that lash strands should be well isolated and not glued together. Extensions are attached to individual lash strands and not to the skin.
Step Seven
Extensions are fixed depending on the lash style chosen; this would mean that you are well aware of the preferred style and have created the perfect mapping style to nail the look. The extensions are fixed in lengths and curl from the inner to the outer corners of the eyes.
Step Eight
Do not get up immediately after your eyelash application. It is important to sit still and allow your eyelashes to dry correctly. Avoid any activity that would cause you to change position constantly.
Step Nine
Once they are dried, a lash comb or spooly is used to brush through your lash extensions. If fixed correctly, you would brush through seamlessly.
Step Ten
After the entire application, gently remove the hydrogel pads and the strips; it is a straightforward step and shouldn’t be painful.
Easy Guide To Applying Eyelash Extension Strips
Eyelash extensions can come in single strands, fans, and STRIPS. The Extension strips are more straightforward to master.
Follow this simple guide to fixing your eyelash strip yourself! Yes, you can do it yourself with our simple illustrations below:
- Clean your eye area and make it free from makeup and dirt.
- Clean your hands properly.
- Get out your lash extension from its box.
- Check if it would need any trimming and do so before fixing it.
- Make sure you are standing before a mirror because you would use both hands.
- Use your Lash brush and brush your natural lashes to avoid getting in the way.
- Take your non-irritating lash glue and line it at the base of your lash extension.
- Allow the glue to get a little tacky to prevent the extensions from slipping off due to the wetness of the glue.
- Lower your eyes and set this over your eyelid just above your lashes.
- Adjust till appropriately fitted from the outer to inner corners of the eyes.
- And finally, leave to dry.
And Voila! There you have it, beautiful extensions all fixed by yourself!
With our simple step-by-step guide, lash extension applications don’t have to seem like an arduous task. We’ve simplified eyelash applications for you, so you can be your lash boss and slay that look!