Mascaras are your go-to makeup tool as they can create glamorous looks with a swoop of the wand. We can paint the effect of using mascaras in colorful light but we cannot categorically say the same for the ingredients.
There are ingredients in mascara today that can be harmful to your eyes and health. In my article: What does mascara do? You’d find a list of some harmful ingredients to avoid while purchasing mascara.
If you are unsure about using conventional mascaras because you cannot verify their ingredients, then making your mascara can be the next best option for you. By using very simple homemade tools you can make a mascara formula that you are more certain about its ingredients.
In my article, I would be showing you how to use simple home or drugstore supplies to make your mascara.
How To Make Mascara
Making your mascara may not have been one of the possible DIYs that come easily to mind.
And we understand why, we assume it’s some mystery formula that gives us those glamorous-looking lashes. But what if I showed you that with available home ingredients you can make your mascara. This article will show you five different ways to make your mascara with common household supplies.
Method 1
Our first recipe here will not only darken your lashes but will also make your lashes longer and thicker. Tell me, who doesn’t want that?
Ingredients of This Recipe
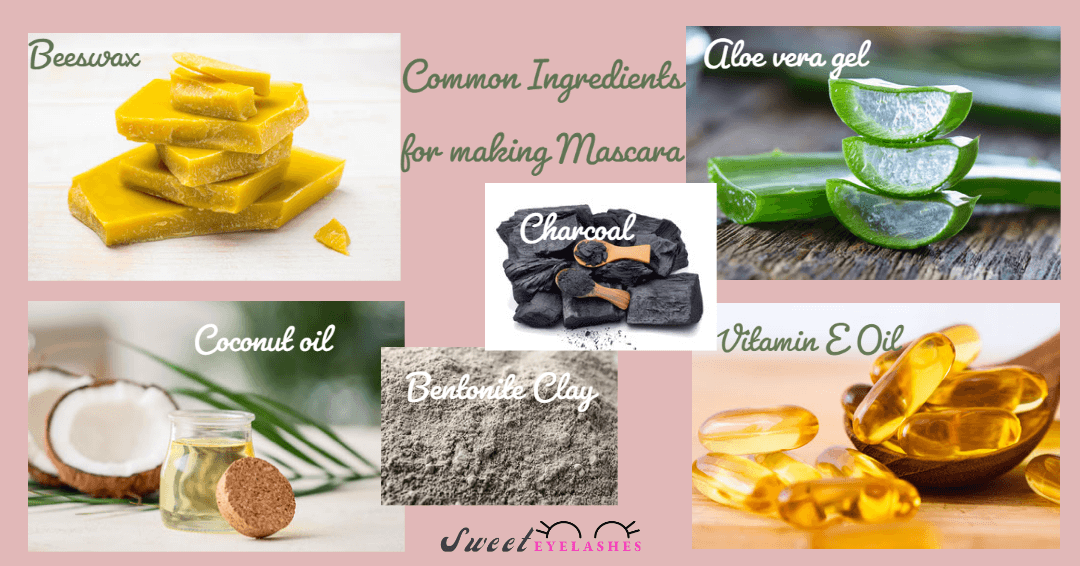
Activated Charcoal: ½ teaspoon
Aloe vera gel: 2 tablespoon
Extra Virgin coconut oil: 1 tablespoon
Beeswax: 1 ½ tablespoon
A clean mascara container for storage
Steps
Make sure you have your ingredients in easy-to-dissolve states. Your beeswax will come in a granulated form and it should be grounded into a powder.
Prepare a pot of water and allow boil
Place your aloe vera gel and beeswax and coconut oil into a small container.
Place the smaller container of three ingredients above, and place it on the boiling water.
This method helps you preserve all the natural compositions of the ingredients. Too much heat can feature your ingredients making them ineffective.
Leave on boiling water till all ingredients are fully dissolved.
Add your charcoal to the mix and stir with a stirring rod, till it is mixed completely and evenly.
Allow your formula to cool down
Put it into your clean mascara container. Use a piping bag to get your content into the container.

Method 2
Charcoal and Bentonite Clay Mascara
Our second way of making mascara
Ingredients:
Activated charcoal: 3 capsules
Beeswax: 1/2 teaspoon
Aloe vera gel: 1 tablespoon
Coconut oil: 1 teaspoon
Vitamin E oil: 1 teaspoon
Bentonite clay: 1/4 teaspoon
Steps
Put measured quantities of beeswax, and coconut oil into a small bowl.
Place a pot of water to boil
Place your container into the boiling water and allow the ingredients to dissolve together
Break open your charcoal capsules into the mixture
Put your bentonite clay into this mix and mix properly.
After it is dissolved, heat your aloe vera gel in the same way.
Pour your melted oil into the aloe vera gel and mix well, till the consistency is formed
Add your 1 teaspoon of Vitamin E Oil
Scoop your mascara mix into a clean mascara bottle or use a syringe to inject it into the mascara tube.
Method 3
Clay of your choice: 5 teaspoons
Vegetable glycerin: 1/4 teaspoon
Water: 1 1/2 teaspoon
Guar gum: ⅛ teaspoon
Steps
Get a clean bowl
Put the right quantity into your bowl
Pour in your glycerine, this would form a slurry
Add water to this picture and stir well
Add your preferred clay into the mix
Stir well till the mixture is even.
If your mixture is too runny, add a pinch of guar gum into it. It would thicken it.
Method 4
Mica Powder of preferred Color
Aloe Vera Gel Vegetable Glycerine
Vaseline
This is a very simple mascara that can offer you different colors and the added benefit of moisturizing your large with Vaseline.
Steps
Start with a clean bowl
Scoop 2 teaspoons of Vaseline into a bowl
Put ½ a teaspoon of aloe vera gel into the same bowl
Mix well, till you get a uniform consistency
Add a pinch of mica powder into this mix
Still, we’ll, till the color is uniform
Store in a clean mascara container.
Method 5
Our last method here is to make A Clear Mascara. You must have heard all about the benefits of using Clear Mascara and you wouldn’t mind making one for yourself.
Ingredients
1 tablespoon coconut oil
1/3 tablespoon aloe vera gel
1/3 tablespoon beeswax
1 tablespoon almond oil
Steps:
Grate your beeswax and place it into a clean bowl.
In the same bowl, add your beeswax with coconut and almond oil.
Place both mixtures into a pot of boiling water.
Stir will a clean spoon till both oil and was is fully melted.
With your heated aloe vera gel in the same pattern.
Pour your melted wax and oil into the aloe vera gel and mix thoroughly.
Leave your formula to cool down, and pipe or inject into a clean mascara container.
Extra DIY Mascara Ingredient Tips and Guidelines
When making your Mascara, it is crucial to keep these in mind:
The color pigment is obtained from the type and color of the clay used. For a brown pigmented mascara use cocoa powder.
The glycerine, aloe vera gel, and vaseline, all act as moisturizing agents and help give the formulas some consistency.
The bees wax gives your formula its consistency, same with the guar gum. So for a thicker consistency use a little more.
It’s always best when using Vitamin E oil to add it once your formula is off direct heat. Too much heat ruins your Vitamin E oil.
Avoid directly heating your wax and oil in a saucepan as this could denature your oil. Your oil can lose its effectiveness once placed under too much heat.
Always add your melted oil into your warmed aloe vera gel and glycerine mixtures.
Adding or using bentonite clay could make your mascara less likely to smudge.
Also, note that using Vaseline could make your mascara more likely to smudge because of how oily it is. You would get good moisturizer lashes but oily ones.
Oils like coconut oil and almond oil have nourishing fatty acids to keep your lashes stronger and aid better growth.
The method of placing a bowl into a boiling pot is also called a Double Boiler Method and it’s the safest way to preserve your ingredients from direct heat.
How To Fill in Your DIY Mascara
Mascara formulas can be pretty difficult to place into tubes because of their bottleneck design.
We suggest you use a syringe to draw in the formula and press it into the tube.
You can create your piping bag, by using a plastic bag and creating a tiny hole at the tip.
A spoon can be used to scoop mascara over the top of your mascara tube and tapped on a table to get the formulae to sink in.
How To Keep and Preserve Your DIY Mascara
After your Mascara has been made how you preserve and store it is important.
Keep your mascaras away from direct sunlight.
Avoid keeping them on your window beams or tables where sun rays hit.
Keep your DIY Mascara refrigerated to help extend viability.
Always leave your mascara wand tightly covered when not in use. This is to avoid drying out your formula or causing it to cake in the tube. A very safe way to keep germs from getting into your mascara formula.
When using your mascara avoid the contents getting into your eyes.
DIY Mascara should not be kept longer than 4-6 months. I advise contents should be replaced every 3 months, or when you notice a change in the mascara appearance.
With your homemade mascara, Say goodbye to harmful mascara ingredients and say Hello to safety! It isn’t that difficult to mix your mascara. You’d notice healthier-looking lashes less likely to shed prematurely because of the presence of conditioning oils.
With DIY Mascara, you get stronger, thicker-looking lashes and a naturally safe lash coat as well.