Have you ever tried to do eyelash extensions but had no idea how to apply them? Or maybe you’ve been waiting for someone to guide you and teach you the basics? Well, there are different ways to apply eyelash extensions, and in this article, we will discuss everything you need to know about applying eyelash extensions.
Getting Ready For Eyelash Extensions
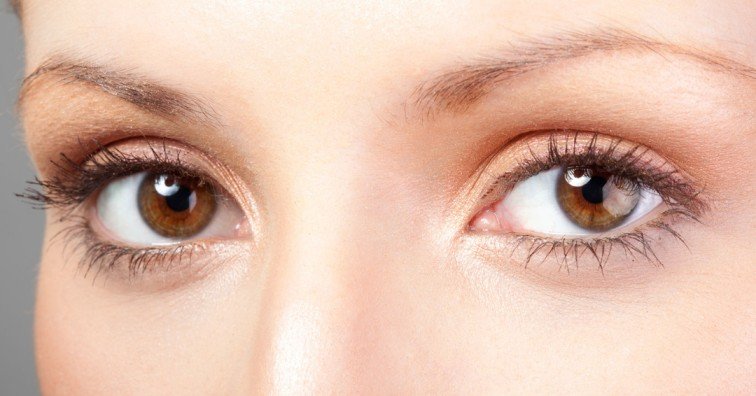
Eyelash extensions are semi-permanent fibers attached to your natural lashes for a fuller and more prolonged effect using semi-permanent glue. However, if you want a fuller look, multiple extensions will be added to one lash, and depending on your lash artist, they could be in synthetic, mink, faux mink, or silk fibers with different lengths and curls.
Getting your client prepped before getting eyelash extensions is the most crucial aspect of the whole eyelash extension application, meaning if the client is prepped the right way, the application process will be straightforward and will lead to desired results. Below are ways you can get your client ready for eyelash extensions.
1. Remove all eye makeup
Remove mascara, eyeliner, and eye shadow with a water-based cleanser and dry with a lint-free cloth. If heavy makeup dirt or oil is on your lashes, more time will be required to clean your lashes which will leave less time to apply for your lash extensions. If the time used for cleaning is more than the time used to apply the lash extensions, you won’t be able to receive the full benefits of lash extensions because your lashes won’t be as complete as possible.
2. Remove Contact Lenses
This should be removed to avoid discomfort and eye damage since the eyes will be closed during the application process. However, they are safe to be worn after the lash appointment, but it is highly recommended to have them removed during the application process to reduce dryness in the eyes.
3. Limit Your Intake Of Caffeine And Other Stimulants
Caffeine can cause the eyelids to twitch uncontrollably during the application, resulting in a faulty extension. It can also cause restlessness in your client, leading to incorrect extensions.
4. Avoid Taking Too Much Liquid
Advise your client to take a little liquid, so they don’t use the restroom frequently.
5. Reduce Allergic Reactions
Before the appointment, ask your client about allergies, and if they have a history of allergies, advice them to take an antihistamine to aid their sensitivity to chemicals. However, most patients take both antihistamine and mast cell stabilizers.
6. Do Away With Mobile Devices
Using mobile devices can cause distractions, and the application process requires them to have their eyes shut for the entire session for safety reasons. Instead, have them listen to relaxing music or a podcast and make sure their phones are on silent to avoid whatsoever distraction.
7. Wear Comfortable Clothes
Advise your clients to wear comfortable clothes to make the most relaxing appointment.
8. Do Not Wear Large Or Dangly Earrings
The application process will require laying your head on a comfortable pillow. Therefore, large or dangly earrings will get in the way and make you uncomfortable.
9. Do Not Curl Lashes
Curling the lashes before the lash appointment is not advisable in any way, and this is because the lashes need to be in a natural and healthy state to ensure a smooth application process.
10. Arrive On Time
The application process takes two hours, so to avoid wasting time, be punctual.
How to Do Eyelash Extensions
1. Wash The Client’s Lashes
Cleaning the eye area and lashes before the application is essential because the extensions do not adhere well to dirty lashes. Whether applying a full set or a fill, the lashes should be cleaned thoroughly to avoid any debris that can cause a barrier between the natural lash and the adhesive. Check Out: How To Wash Eyelash Extensions
2. Apply Primer
Applying primer helps achieve a faster application time by dissolving natural oil and makeup residue on the natural lashes. However, if you do not use Primer and try to attach the extensions on dirty lashes, the glue will stick to the oil and dirt particles instead of sticking to the surface of the natural lashes.
3. Gently Apply Under-Eye Patches
The primary function of under-eye patches is to isolate the bottom lashes from the top lashes and to prevent sharp tweezers from causing any injury to the clients’ eyes. When applying under-eye patches, do not place the stickers too close to the eyes; instead, let the sticker be placed over the lower lashes about 3-4 millimeters from the lower lash line.
4. Map Out Your Eyelash Set
Lash mapping is essential because it saves time and helps to decide the length of extensions to use. It also offers excellent lash extensions for your client and allows you to create the perfect extension. Check Out: Hybrid Lash Mapping Guide
5. Choose Extensions Carefully
Now it’s time to get the work started. Use at least three lengths of extensions ranging from 6 mm to 14 mm. Always start with 8 mm lash extensions across the eye to create a thick lash line. For a more natural look, go for 0.15mm in thickness and B or C curly lash extensions.
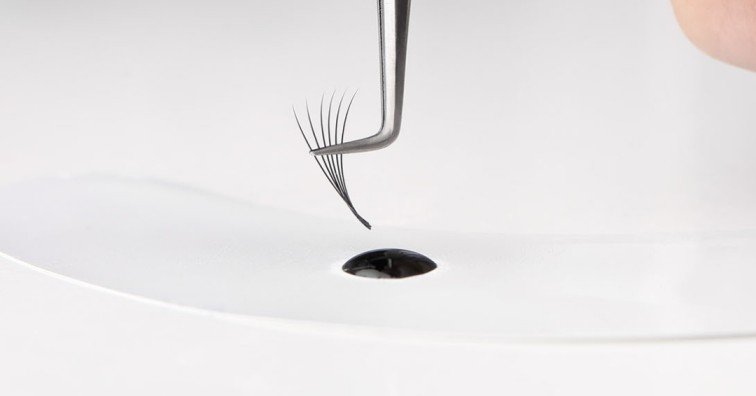
6. Pick Up The Individual Lashes
Spread lashes out for quick pick-up of the extensions. ORIENT the extension effectively in the tweezers, and it should be at a 90-degree angle to the straight tweezer for easy application. Check Out: Individual Lash Application for Beginners
7. Dip Lash On Glue
While holding the extension, dip into the glue and ensure a balance between little and too much glue to avoid retention.
8. Isolate And Swipe
Properly isolate the natural lash with the curved tweezers. Then swipe the extension along the natural lash and coat with adhesive from base to tips with no gaps in the glue.
9. Apply The Extension
Place the extension on the natural lash after swiping with enough adhesive to coat it on the natural lash around 1/2- 1 mm away from the eyelid. Release the extension onto the natural lash and let it face upwards and parallel to other lashes. After application, avoid touching the extensions. Instead, move to another area and apply the extensions repeatedly until it becomes difficult to isolate more natural lashes
Subsequently, use tweezers to separate extensions, and natural lashes stuck together. Grasp and separate horizontally and never pull the natural lashes in a vertical direction or area with rigidity. This should be done when the adhesive is dry but not fully cured. Repeat the separation process until every natural lash is bonded.
10. Dry The Lash Adhesive
When the lash extensions have been securely bonded, allow drying for three to five minutes. To improve retention, use a super bonder to cure the adhesive bond. Use a lash fan to dry the lashes, and mist with distilled water, dry again for three minutes and perform a final round of separation.
Caring For Your Extensions
Now that you’ve applied the lash extensions, you need to ensure they stay in place and last longer. The first step is to avoid getting them wet for the first 48 hours after application. Next is to avoid steaming your face and using oil-based cleansers, and stay away from waterproof mascaras, glittery eye shadows, and loose powder.
Always remember to brush them out occasionally ad stay clear of mechanical curlers. Most importantly, do not pick or pull the extensions; otherwise, you may damage your natural lashes. Also, avoid powerful showerheads because the pressure can rip your lashes. Lastly, ease up on the eye cream and witch to a silk or satin pillowcase.